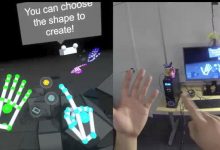
原来这位牛人在1.0时就已经开始写手势识别并且赚钱了!现在kinect都要2.0了,他也开始开发新的手势了。(三个月了,他还没写好) 如果对Kinect手势识别感兴趣的,可以看下这篇文章,联系下他。他说2.0的手势识别售卖会把源码(c#)一起发出去。看Kinect论坛,大家对于Kinect2的unity3d插件需求强烈。但愿我下半年也有时间和能力写出一些插件吧(肯定是有免费,也有收费的了)。
GESTUREPAK 2.0 ALPHA
 CARL FRANKLIN | POSTED ON
  MONDAY, DECEMBER 30, 2013 AT 10:52AM
NEW KINECT FOR WINDOWS AND SDK ARE COMING!
When the Microsoft Kinect for Windows team sent all of it’s MVPs (myself included) the new Kinect Sensor and access to the Developer Preview edition of the Kinect For Windows SDK v2, it didn’t take me long to refactor the GesturePak Matcher to work with the new sensor.
The difference is amazing. This new sensor is so much more accurate, so much faster (lower latency) and can see you in practically no light. Clearly, there will be a demand for robust and easy gesture recognition software.
Background
I wrote GesturePak to make it easier for developers and end users to create and recognize gestures using Kinect for Windows. You essentially “record” a gesture using movements, the data is saved to an xml file, and you can then load those files in your code and use the aforementioned GesturePak Matcher to tell you (in real-time) if your user has made any of those gestures.
GesturePak 2.0
GesturePak 1.0 was fun to write. It works, but it’s a little clunky. The device itself is frustrating to use because of lighting restrictions, tracking problems, jitters, and all that. The biggest issue I had was that if the Kinect stopped tracking you for whatever reason, it took a long time to re-establish communication. This major limitation forced me into a design where you really couldn’t walk away from tracking to edit the gesture parameters. Everything had to be done with speech. Naming your gesture had to be done by waving your hands over a huge keyboard to select letters. Because of this, you had to break down a gesture into “Poses”, a set of “snapshots” which are matched in series to make a gesture.
For version 2.0 I wanted to take advantage of the power in the device to make the whole experience more pleasant. Now you can simply record yourself performing the gesture from beginning to end, and then sit down at the machine to complete the editing process.
Video: Carl shows you how to create and test a gesture in about 2 minutes.
To make the new GesturePak Recorder/Editor app, I started with the Body demo that came with the Developer Preview SDK, and using partial classes I added the supporting code in another C# file. I also wrote a tester app that loads all of the gesture files in your DocumentsGesturePak folder and tells you when you have a match.
GesturePak File Format v2
The xml file format in v2 is vastly different, easier to read, and makes more sense. Here is a sample from a new gesture file:
|
1 2 3 4 5 6 7 8 9 10 11 12 |
<Gesture> <Name>Flap</Name> <Version>2.0</Version> <FudgeFactor>0.2</FudgeFactor> <TrackXAxis>True</TrackXAxis> <TrackYAxis>True</TrackYAxis> <TrackZAxis>False</TrackZAxis> <TrackLeftHandState>False</TrackLeftHandState> <TrackRightHandState>True</TrackRightHandState> <TrackSpineBase>False</TrackSpineBase> <TrackSpineMid>False</TrackSpineMid> ... |
As you can see, all the Tracking properties are now in the Gesture class, which is where they make sense. A new feature lets you track the state of the hands (open, closed, etc.), allowing for even more interactive gestures.
POSE is now FRAME
In v1 you had to “pose” for a “snapshot,” a single array of data that describes the location of all of your joints in 3D space. A Gesture occurs when GesturePak sees a person match two or more of these “poses” over time in the right order.
Since v2 doesn’t require you to “pose” at all (you simply perform the gesture) it makes more sense to call these individual snapshots “frames” like frames of a movie. That’s what they are, really.
Let’s look at how frames are expressed in the new Gesture file format:
|
1 2 3 4 5 6 7 8 9 10 11 12 13 14 15 16 |
<Frame Name="Frame 1" Match="False" xml:lang="en"> <DurationMax>5000000</DurationMax> <DurationMin>0</DurationMin> <LeftHandState>0</LeftHandState> <RightHandState>0</RightHandState> <SpineBase> <X Value="-0.002527997" /> <Y Value="-0.262233" /> <Z Value="2.130034" /> </SpineBase> <SpineMid> <X Value="-0.005012542" /> <Y Value="0.08136677" /> <Z Value="2.171184" /> </SpineMid> ... |
We still save all the raw data in the XML file, but it’s strongly typed. That makes it easy to find the exact value you’re looking for. This is a big improvement over v1. The hand state is also tracked. Importantly, GesturePak 2.0 will load gesture files created with v1.
Recording a Gesture
My goal is to simplify. No GestureMouse. No naming gestures with “the force.”
The Recorder/Editor now has two modes, Live and Edit. In Live mode you can record and test your gestures. In Edit mode you do everything else. The app starts in Edit mode. To record a gesture, you first press the “Live Mode” button and then the “Record Gesture” button.
Simply stand in front of the Kinect and wait until it’s tracking you. Now say “Start Recording.” A red light will appear on the screen. Make your gesture from start to finish and say “OK. Stop.” The light goes off, and a “Save As…” dialog pops up. GesturePak has just recorded every frame that happened when that light was on. It could be hundreds of frames.
Walk up to the app, save the file, and sit down. Your real time skeleton goes away and the gesture you just recorded comes up on the screen in Edit mdoe. Use the mouse wheel to “scrub” through every frame of the gesture, or press the Animate button to watch your stick figure repeat your gesture.
Editing your Gesture
Editing is extremely easy and only takes a few moments once you get the hang of it. Changes are saved automatically.
Select joints to track
Simply mouse click or touch a joint to toggle tracking. Tracked joints appear white and not-tracked joints appear green. As you hover over the joints with a mouse the joint name is displayed above the skeleton. Changes are automatically saved.
Trim the gesture
You can optionally trim out unnecessary frames with the “Trim Start” and “Trim End” buttons. To trim the leading frames, scrub to the first frame that you’d like the gesture animation to start with, and then click “Trim Start.” Changes are saved automatically. Similarly, scrub to a frame after the gesture has been completed and click “Trim End.” Now you’ve at least thinned out the data a little. Note that trimming does not define the frames that will be matched (for that, read on), it just cuts out unwanted frames. The animation should be smooth from start to finish.
Pick the frames for GesturePak to match against
It may seem like you have all the data you need to let GesturePak do it’s thing. The fact is, there’s too much data. If we required the matcher to match every single frame there would a higher chance of the gesture not being recognized. So, scrub through the frames and pick the smallest number of frames necessary to define this gesture. You can select or de-select a frame by clicking the “Match” button.
Test it!
To test it, just click the “Live Mode” button, step back, and perform the gesture. You’ll hear the word “Match” when you do it correctly (assuming that your volume is up and your headphones aren’t plugged in and all that). Of course, if you look at the code, it’s just playing a WAVE file when it gets a match. Your code can do anything you want it to do.
Other Parameters
Just as with GesturePak 1.0, you can opt to track the X, Y, and Z axes individually. By default Z is not tracked. You should only track it if it matters to the gesture, otherwise it could lead to inaccurate results.
You can also track the hand state. Think of hand state like another joint. If you track the right hand state, and in your gesture you open and raise your right hand, close it, move it to the left, and open it, you can match that action precisely. The first frame to match is where your hand is up and open. The second frame would be where your hand is closed. The third frame would be where your hand has moved but is still closed, and the fourth would be when your hand opens again.
The FudgeFactor is what we called “Accuracy” in GesturePak 1.0. This is the amount of variance that’s allowed when we sum the X, Y, and Z positions and compare them to poses in the gesture. A larger number means more false positives. A smaller number means more accuracy is required to trigger a gesture.
The Max Duration is a millisecond value that defines the maximum amount of time allowed on a particular frame. If a timeout occurs before the next frame in the gesture is matched, the gesture will not be matched and you’ll have to start over at the first frame. By default, you get half a second at each frame. This ensures that gestures are done intentionally. You can, of course, adjust this value.
Using the GestureMatcher in your code
The Kinect for Windows sensor can track up to 6 people (Body objects) at once! So, in this case, you’d create an array of 6 GestureMatcher objects that will correspond to those Body objects.
|
1 2 3 |
private GestureMatcher[] matchers = new GestureMatcher[6]; |
Load a list of gestures you want to track into each GestureMatcher. Here’s a method that loads all of the gestures in your GesturePak folder:
|
1 2 3 4 5 6 7 8 9 10 11 12 13 14 15 |
void loadGestures() { string GPpath = Environment.GetFolderPath(Environment.SpecialFolder.MyDocuments) + "\gesturepak"; var files = System.IO.Directory.GetFiles(GPpath, "*.xml"); var gestures = new List<Gesture>(); foreach (string file in files) { gestures.Add(new Gesture(file)); } for (int i = 0; i < matchers.Length; i++) { matchers[i] = new GestureMatcher(gestures); } } |
When dealing with Body objects, you use a BodyFrameReader, handling a FrameArrived event. Here’s the bare minimum code for handling Bodies, associating them with a GestureMatcher, and checking for Matches. There is code missing here, of course, but it’s to show you how easily GesturePak fits into the existing framework of code surrounding the handling of real-time Body data from the Kinect sensor. For actual working code, look at the GesturePakGestureTester app.
|
1 2 3 4 5 6 7 8 9 10 11 12 13 14 15 16 17 18 19 20 21 22 23 24 25 26 27 28 29 30 31 32 33 34 35 36 37 38 39 40 41 42 43 44 45 46 |
void reader_FrameArrived(object sender, BodyFrameArrivedEventArgs e) { BodyFrameReference frameReference = e.FrameReference; try { BodyFrame frame = frameReference.AcquireFrame(); if (frame != null) { // BodyFrame is IDisposable using (frame) { // This is required by the SDK to acquire the actual Body position data into the bodies array // bodies[] is an array defined elsewhere frame.GetAndRefreshBodyData(bodies); for (int i = 0; i < bodies.Length; i++) { Body body = bodies[i]; GestureMatcher matcher = matchers[i]; if (body.IsTracked) { // associate this body with it's matcher if it's not already if (matcher.Body == null || matcher.Body != body) matcher.Body = body; // draw body frame here if you like // Do we have a match on this gesture with this Body? Gesture match = matcher.GetMatch(); if (match != null) { // match is the gesture that was matched! } } } } } } catch (Exception) { // ignore if the frame is no longer available } } |
Source will be included in v2
The price has not been set, but I plan to ship the C# source with GesturePak 2.0 at some level. You will be free to modify it for your own apps and use it however you like. You will get the source code to the API, the recorder/editor, and the tester app. The recorder/editor can be modified and included in your own app if you want to give your end-users the ability to create their own gestures. If you have code to contribute back to GesturePak, I would welcome it!
Get the bits!
Do you have the Kinect for Windows Developer Preview SDK and the Kinect Sensor v2? Would you like to take GesturePak 2.0 for a test run? Send me an email at carl@franklins.net with the subject GesturePak 2.0 Alpha and I’ll gladly send you the latest bits. I only ask that you are serious about it, and send me feedback, good and bad.
 小明编程
小明编程

![[转]matlab自带相机标定程序对kinect进行简单标定-小明编程](https://ws1.sinaimg.cn/large/005HYjuQly1fijj7qtsu3j30c207dq5o.jpg)


![[转]利用Kinect把任意屏幕变得可触控-小明编程](https://brightguo.com/wp-content/uploads/2017/04/o_wite-220x150.png)
![[转]深度图像的获取原理-小明编程](https://brightguo.com/wp-content/uploads/2017/04/20170406100208362-220x150.png)


