最近开始玩起Myo腕带,貌似myo真的是没法关闭的,每次戴上myo时记得使用同步手势哦(第10小结)
We’ve made the setup process easy with Myo Connect! This simple, online guide will walk you through all the necessary steps as well as the Getting Started Guide.
Myo Connect is supports Windows 7 and higher.
1. Download the Myo Connect installer here. Once the download finished, double click to run it.
2. Follow through the steps of the Myo Connect Setup.

During the installation, you will receive the following security dialog for installing the driver for the USB Bluetooth adapter packaged with your Myo armband. Click Install to continue.

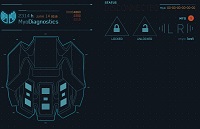
3. Once Myo Connect is successfully installed, it will launch automatically and the Getting Started Guide is displayed. Click Continue to begin learning how to use your Myo with your computer!

4. Connect the USB Bluetooth adapter to your computer, then the Standard Micro-USB Cable, then your Myo armband. Click Continue when all have been recognized.

5. Give your Myo armband a name and click Continue. This is the name you see when you connect Myo to any device.

6. Register your Myo armband by entering your email address and clicking Register Myo. Click Skip in the bottom right corner if you do not wish to register.

7. If there is a firmware update available for your Myo, you will be prompted to update before proceeding. Click Update Myo to continue.

8. When the update has finished, disconnect the Myo armband from the USB cable and clickContinue to advance to the next screen.

If your Myo was just updated, the status LED will pulse a pale purple colour for a few moments as it completes the update. The Myo will then connect to your computer via Bluetooth (indicated by the status LED turning solid blue) automatically.
9. Now that your Myo is connected to your computer through Bluetooth, watch the video on how to wear and sync with Myo then click Continue.

10. Perform the Sync Gesture for yourself to proceed to the next step.

11. In some conditions Myo may need to warm up while it forms a strong connection to the muscles in your arm. Wear Myo until it vibrates, unsync and then resync it to continue. If you don’t see this screen, don’t worry! Move on to the next step.

12. Myo Connect will discover what arm Myo is on. Click Continue to proceed. If it’s detected the wrong arm, slide it down your arm, put it back on with the USB port facing your wrist and perform the Sync Gesture again.

13. Learn and practice the 5 basic gestures and click Continue when ready to proceed. The order of the gestures may be different than what is shown below – it’s random!


14. Myo Connect is an application that runs in the background to allow you to use your Myo with your computer. The application icon is shown in the Windows system tray. Right click it for the menu options. Double Tap to continue.

15. Remember: any time you put your Myo on, you’ll need to do the Sync Gesture. Click Continue.

16. You can do a lot with Myo! Click on Myo Mouse and Keyboard, Presentation Control or Myo for RC to learn more or close the Guide and begin controlling your computer with Myo.

![[视频]手势控制时代来临!Gesture Control Has Arrived!-李逍遥说说](http://brightguo.com/wp-content/uploads/2016/06/myo-Gesture-Control-Has-Arrived-small-220x150.png)


![[PPT]myo介绍-李逍遥说说](http://brightguo.com/wp-content/uploads/2015/03/myo-small.jpg)